Follow along with the slides here: https://docs.google.com/presentation/d/1fvojKdQUyRgDIOh96k5Ml9WmcKcl19B9HhirzVG2p10/edit?usp=sharing
Adapted from: https://docs.djangoproject.com/en/1.10/intro/tutorial01/
We are going to build a Poll for people to vote on the project to win Semester.ly's award! (Or anything else).
##Step 0: Fork the Repository If you don't have git, install it here: https://git-scm.com/book/en/v2/Getting-Started-Installing-Git Once you have it, click the Fork button above to make your own version of this repo!
More simply, clone with the following commands:
git clone https://github.com/noahpresler/Django-Tutorial.git##Step 1: Install Python/Pip
Django is a web framework that works with Python. If you don't already have python, install it here: https://www.python.org/downloads/
Now, we are going to go ahead and install Django, and VirtualEnv. To do this, simply enter the repository:
cd Django-Tutorial
and checkout the file 'requirements.txt', you'll see:
Django==1.9.2
virtualenv==1.11.4
Now let's install pip. Simply run
sudo python get-pip.py
Now you've installed pip! ##Step 2: Enter your Virtual Environment and Install Requirements First, enter:
$ source venv/bin/activateOn windows:
> venv/Scripts\activateThen, execute:
$ pip install -r requirements.txt --userYou will install Django version 1.9.2 and virtulenv 1.11.4
##Step 3: Boom, Workshop Done! Try this:
$ python manage.py runserverNow, head over to 'localhost:8000' in your favorite browser (Chrome, of course) Check it out! Your server is working. (Ignore the migration error).
####Your app works - k bai!
##Step 4: Jk, jk - let's get to it: Write your First View
Now, you'll see in your directory the following:
Django-Tutorial/
├── db.sqlite3
├── djangoworkshop
├── get-pip.py
├── manage.py
├── polls
├── README.md
├── requirements.txt
└── venv
This is because we've setup your app directory for you. In the future you can execute 'python manage.py startapp name_of_your_app' to do this.
Let's go ahead and write one of those views we talked about earlier. Open the file polls/views.py
from django.http import HttpResponse

def index(request):
    return HttpResponse("Look mom! I made a web app!")
When a request is routed to this method, it will respond with HTTP as shown above.
First, go ahead and uncomment out the line we have in djangoworkshop/urls.py. This will tell our webapp to include the urls we are about to specify.
In order to see the result, we need to route a url to call our view! To do this, go ahead and open polls/urls.py and include the following code:
from django.conf.urls import url
from . import views

urlpatterns = [
    url(r'^$', views.index, name='index'),
]
What this does is map the url matching regex '^$' (which would be localhost:8000 without anything after) to the method named 'index' in our views file.
Go ahead and run your server again, and go to http://localhost:8000/polls/ - you should see your message.
##Step 5: The Database & Migrations Remember models? That way we represent objects, relationships and store them to the Database? Well, before we write one we are going to need to talk about the Database.
You have many choices of databases, The Semester.ly team uses PostgreSQL. You can easily switch, but for simplicity, we are going to use SQLite. SQLite is included in Python, so you won’t need to install anything else to support your database.
Let's get started by executing the following command:
$ python manage.py migrateWe will run this any time we add or edit a model. This command automatically executes any outstanding SQL migrations that tell your database how to add/remove/edit the tables used to store your objects/relationships. This is pretty magical, you don't need to write any SQL - Django will automatically transform your python into a database :). We don't have any tables yet, so this command is just initializing our database.
In the future, when you edit the models.py file, execute the following to update your DB:
$ python manage.py makemigrations #make the migration based on your changes
$ python manage.py migrate #execute the migration editing the database
##Step 6: Models We are going to make two models: a question and a choice.
Question defined by a publication date, and a question text.
Choice defined by the text of the choice, and the tally (count).
One might say that a question has many choices. - to represent this relationship each Choice will point to a question to show what it belongs to.
Open up polls/models.py and let's create these:
from django.db import models

class Question(models.Model):
    #a character field like a string with length <= 200 chars
    question_text = models.CharField(max_length=200)
    # a date field to represent when it was published
    pub_date = models.DateTimeField('date published')

    #pretty printing toString method
    def __str__(self):
       return self.question_text

class Choice(models.Model):
    #This stores a foreign key (the identifier) of a question model to which this choice belongs
    #The on_delete/CASCADE part tells the database to delete this coice if the question is deleted
    question = models.ForeignKey(Question, on_delete=models.CASCADE)
    choice_text = models.CharField(max_length=200)
    votes = models.IntegerField(default=0)

    #pretty printing toString method
    def __str__(self):
        return self.choice_text
Swag. Now, pop quiz: what do we do after we edit models to have the change take place in the DB? Answer: makemigrations and migrate!
$ python manage.py makemigrations #make the migration based on your changes
$ python manage.py migrate #execute the migration editing the database
##Step 7: Creating Questions and Choices
From python, you'll be able to create new objects with commands like:
q = Question(question_text="What's new?", pub_date=timezone.now())
q.save()
For now, however, we are going to set up an admin dashboard for you to do this graphically.
First, create a super user:
$ python manage.py createsuperuserenter a username/email and password.
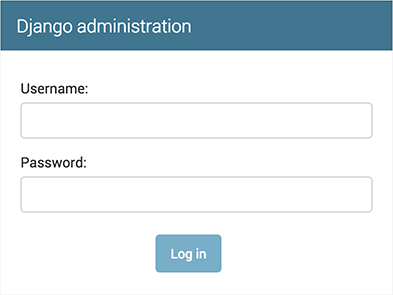
Now, when you run your server and head to http://127.0.0.1:8000/admin/ you should see a nice admin page!
You now just need to register your models with the admin: head to polls/admin.py and uncomment out the lines we have commented.
After logging in you should be able to click the Polls app and play around with creating, editting, and deleting models!
##Step 7: A simple frontend
Lets bring data from our models into the views and throw it into a template! Below we first grab data from the Question model and order it by publication date. context is where we pass the data variables into template variables. Finally we feed the context into a template and return the rendered template!
Edit your index function in views.py to the following polls/views.py
from django.shortcuts import render
from django.template import loader
from .models import Question

def index(request):
    latest_question_list = Question.objects.order_by('-pub_date')[:5]
    context = {'latest_question_list': latest_question_list}
    return render(request, 'polls/index.html', context)
We set up a simple template wrapper for you in polls/templates. Templates are essentially HTML with some DJango syntax that tells Django where to insert the data you want to pass it. Templates allow us to use conditionals and loops! Pass variables by putting them in {{}}
Insert the following code into polls/templates/index.html where it says <!-Insert Code Here->
{% if latest_question_list %}
    <ul>
    {% for question in latest_question_list %}
        <li><a href="/polls/{{ question.id }}/">{{ question.question_text }}</a></li>
    {% endfor %}
    </ul>
{% else %}
    <p>No polls are available.</p>
{% endif %}
##Step 8: Make it Shmexy - Bootstrap
Swoon the judges with a sexy frontend without learning CSS.
Bootstrap allows the user to add classes to html tags in place of writing CSS
Add this inside inside the head tag
<link rel="stylesheet" href="https://maxcdn.bootstrapcdn.com/bootstrap/3.3.7/css/bootstrap.min.css">
And add this right before the end of the body
<script type="text/javascript" src="https://maxcdn.bootstrapcdn.com/bootstrap/3.3.7/js/bootstrap.min.js"></script>
Adding Classes
Here is a quick cheat sheet with all the bootstrap css classes https://bootstrapcreative.com/resources/bootstrap-3-css-classes-index/. You can find the official bootstrap documentation here: http://getbootstrap.com/css/#helper-classes
Bootstrap uses a 12 column grid. col-md-8 means this one column will take 8/12 columns width, while col-md-1 will be the smallest column you can make.
<div class="row">
  <div class="col-md-8">Stuff in here will take up 2/3 of width</div>
  <div class="col-md-4">Stuff in here will take up 1/3 of width</div>
</div>
##Step 9: Out of the nest
Boom, you have views, models and a Bootstrap front end. Continue developing by following along here: https://docs.djangoproject.com/en/1.10/intro/tutorial03/
Learn more bootstrap: http://getbootstrap.com/getting-started/#examples
With this framework you can extend your application to be dynamic and beautiful by building more complicated views, models and templates. This stack is also extremely flexible so you may customize as you wish!
We use React/Redux as our frontend rather than Bootstrap/Templates. We also use PostgeSQL instead of SQLite.
Choose your favorite stack and we're happy to help you get it off the ground :)